I love making soap. I often get asked about the process, which seems mysterious. Here I will give a break down of the process, complete with photos and everything.
The basic process of making soap combines fats and oils with lye. In general fats and oils do not want to combine with lye because they are not friends. We need to convince them this is a good idea, so we heat them up and stir them vigorously. This is a lot like a cocktail party. Give everyone a few drinks, stir them up and all of the sudden…everyone is mixing.
Lye starts off as a solid and must be combined with water. This creates a LOT of heat (exothermic reaction!) and a good deal of bad smell. It is important to do this in a well ventilated area. *Use extreme caution as lye is very caustic and can burn skin, eyes, and the smell can take out nose hairs*. Measure out your lye and water by weight. Get a kitchen scale! When the lye and water are mixed they must be cooled down to approximately 90 degrees or so to encourage it to combine with the oils. If you are using goat milk in place of your water, you will want the milk to be very cold, even with partially frozen bits in it. You will want to add your goat milk slowly, in stages, or the milk will caramelize and turn an undesirable brownish color.
Once your lye is safely cooling (safely- meaning in a ventilated place where dogs and children are not going to knock it over) you can get to work on preparing your oils. Everything must be measured by weight for accuracy. Get a kitchen scale! Did I already say that??? Measure out your oils, some are solid at room temperature and some, like olive oil, remain a liquid. Gently heat the oils in a large pot until they are all in a liquid state. The oils will also need to cool to around 90 degrees. Soap recipes have suggested temperatures that you “soap” at. Most of these recipes will suggest that you soap around 90-100 degrees. Check your recipe for suggested soaping temperatures.
A thermometer is essential for determining the temperature of your lye and your oils. I use a temperature gun which is a fun little gismo that you point at anything (not living) and a red laser comes out of the end and settles on the object you are pointing at (not living) and tells you the temperature. Don’t point it at anything living. If you don’t have a handy temperature gun you can easily use a stainless steel kitchen thermometer. A glass candy thermometer would technically work, but as they are prone to breaking in my house, I have banished them from my property. It is important to wipe off your thermometer after measuring the lye solution and oils, since you will be going back and forth to measure between the two. Napkins or paper towels work great for this.
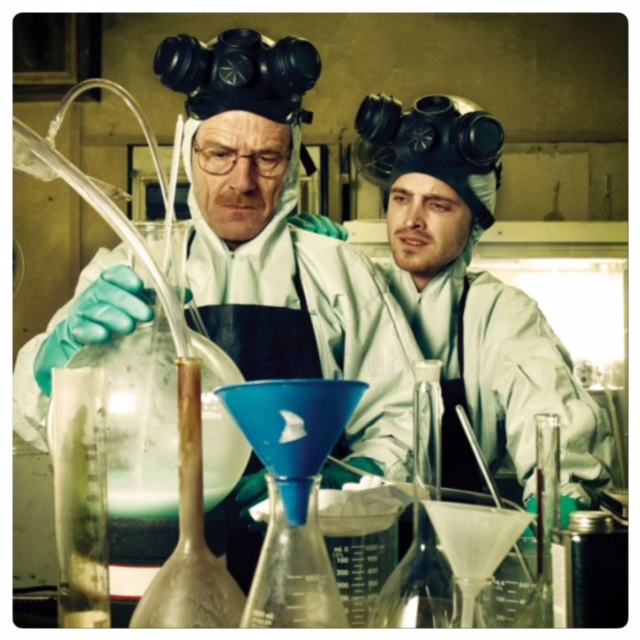
After your temperatures have settled you are ready to begin soaping! I pour my oils into a large plastic bucket. Since I buy my soaping supplies in bulk I always have plenty of 5 gallon buckets. Before I had such a collection of buckets, I just purchased a bucket from Home Depot. After the oils are poured in the bucket you will need to carefully add the cooled lye mixture to the oils. Remember the above mention of how caustic the lye solution is. Take safety precautions! You should look like Walter White in Breaking Bad!
(Safety glasses on!)
It is now time to stir your two components together to begin saponifying. I use a drill for this with a plastic paint stirring attachment. Many people use a stick blender. If you want a rotator cuff injury you can stir by hand. It is critical that what ever you use to stir, you dedicate to soap making. No cross contamination! Every recipe takes a different amount of stirring. It is hard to say how long it will take. Many factors come into play: recipe, temperature, amount of soap being made, types of oils being used, speed of stirring, I could go on and on…
How do I know when to stop stirring? You will stop stirring your soap when it reaches “trace” how will you know when trace is achieved? Your soap batter will get very thick, like pudding. There are many youtube videos available that show trace. Soaping 101 is a good youtube channel to see videos of the process. At trace you can add in your additives such as essential oils, fragrance, oatmeal, honey, I could go on and on… After your additives give it a final stir and you are ready to pour your soap into your mold.
I have several types of soap molds. All of them were made by my industrious husband who loves to make things to “improve and streamline” my hobbies. What ever your mold, unless it is silicone, you will need to line it with parchment paper. After you pour your soap in the mold you will need to spend 1 minute admiring your creation and then you must ‘put it to bed’. Putting your soap to bed involves covering it (I use a piece of wood cut to cover the mold) and wrapping it with a blanket. This process allows your soap to heat up and go through the ‘gel phase’ to further saponification. After 24 hours your soap will be ready to cut into bars. You will need to let it dry and ‘cure’ for about 4-6 weeks before you can use it, making soap is a long process!
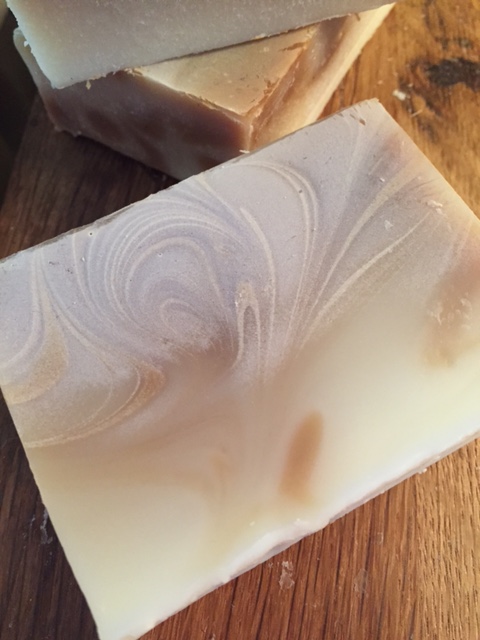
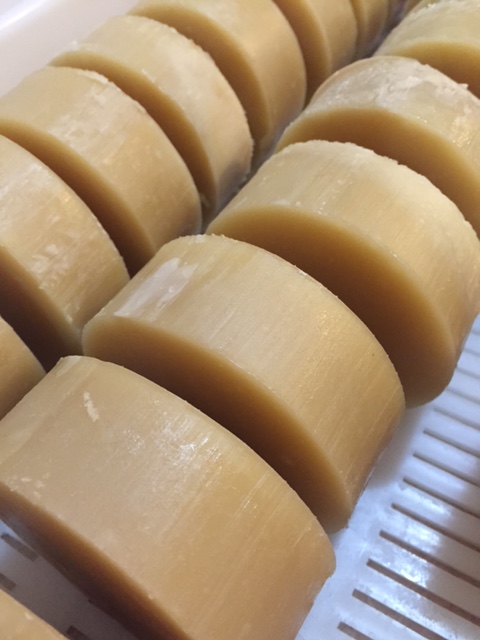
Bar soap and round soap made in a PVC pipe
Making soap takes practice. If you are up for the challenge, watch lots of youtube videos and read some books, study different recipes. Start with a simple, basic recipe and when you get the hang of it, branch out and create something uniquely your own.
Want to skip the making part and just buy some soap? Check out the link to my online shop at Etsy.com:
https://www.etsy.com/listing/248497271/5-bars-of-lavender-vanilla-goat-milk?ref=shop_home_active_1
