First Eggs

There’s nothing like first eggs. After raising 30 chicks last spring, I’ve started to get some of the first eggs from them. Since I have almost 40 chickens, some already of laying age, there is no way to be sure these eggs are from the babies I raised in the spring. However, I don’t recognize them as coming from my older chickens.

Each chicken lays a unique egg. I recall having a Wellsummer chicken which laid a beautiful dark brown egg with tiny even darker brown spots. I could tell her eggs from my other chickens including my other Wellsummers.

Today’s eggs, I’d like to think, are from my young hens. Raising newly hatched chickens is a boat load of work. Baby chicks are messy and require looking after several times a day. Clean water is essential and 30 chicks will keep their water clean for approximately three seconds. This means that the water needs to be changed approximately four hundred times per day. Their light source for heat needs to be constantly monitored and adjusted. Wasted feed and poop mingle together and foul up the bedding which needs to be changed. It’s a chore, but all that work is forgotten when you find a nest of first eggs.

Advertisement

Orchard

I love orchards. We have about thirty fruit trees planted at the moment with plans for more. IMG_4461 (1).JPG

Each tree needs a protective bit of fence around it to keep the alpacas and deer from eating them. Eventually when they are big enough we can remove the tree wells. This is usually around the three to four year age of the bare root trees we buy. I spaced these trees fairly close together which means I can’t use the tractor to mow, I picked up a crappy push mower on Craig’s List so I plan to mow it a few times a year by hand…in the mean time I planted several hundred daffodils.

IMG_4894 (1).JPG

Planting anything with the help of dogs is so much easier than without the help of dogs. Said no one ever. Dogs get very excited about digging holes. When they get tired they like to curl up in them.

IMG_4826 (1).JPG

I can’t wait for Spring to see the bulbs bloom. I hope to add more bulbs every fall. Also toying with the idea of underplanting with lavender. So many great ideas!

Incorporating stumps into the landscape. (If you can’t beat em…join em?)

So many stumps. Sometimes I go out and count them. Creating an orchard in an area with old growth stumps has been a labor of love. It’s coming along. I realized late in the game that I wouldn’t be able to remove all of the stumps no matter how hard I tried. So I incorporated some of them.

img_4996

Some of them make good bird feeders. This particular stump had a perfect hole rotted down the center.


Hugelkulture or how I learned to love stumps…sort of.

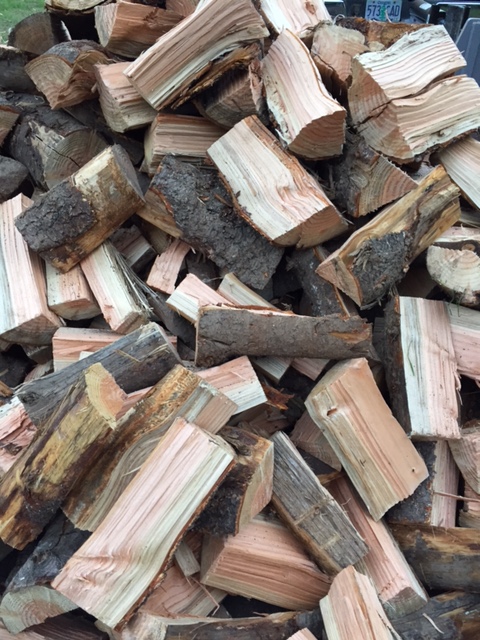
Hugelkulture. It’s a german word. I think it was invented by a guy with a lot of stumps or downed timber. Basically it’s a system of gardening where you bury wood, limbs, stumps, branches etc. and mound dirt over them. The idea behind this is that the wood rots and as it breaks down it provides moisture for the growing bed. This is great for areas with low water or areas that are hard to water. I was excited by this technique because it involved getting rid of: stumps, branches, logs, TREES, of which I have plenty.

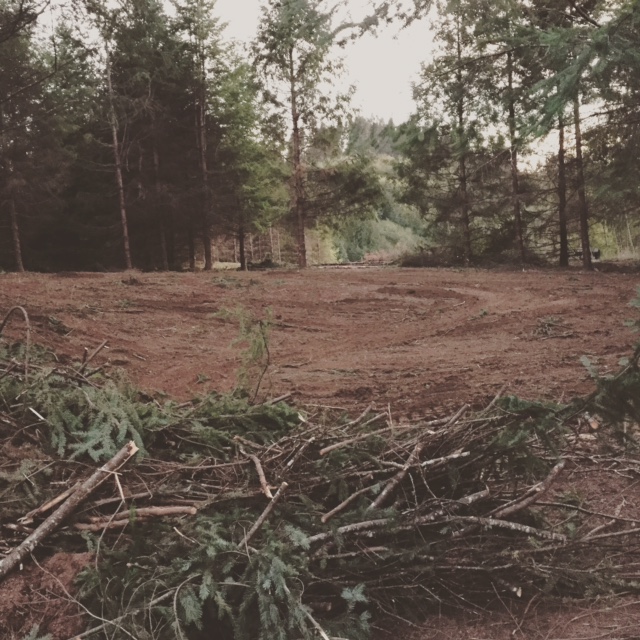
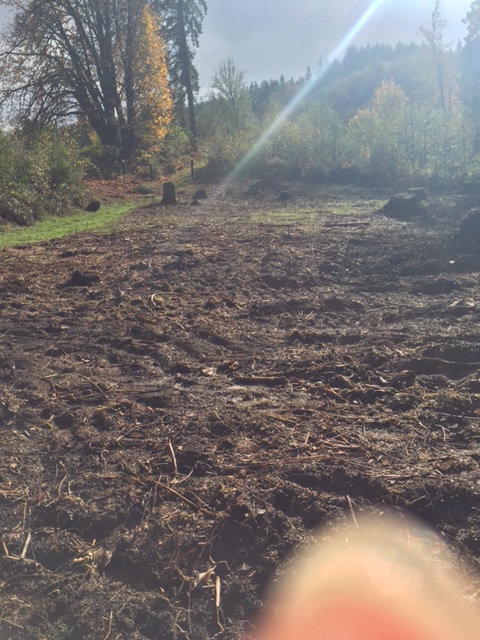
I observed hugelkulture on my property when I was clearing land for our orchard. Logging is not always an efficient operation and much of the slash piles or non marketable  timber is often left on the ground to rot. If you have plenty of time, say like eighty years, this will rot down into some fabulous soil. I didn’t have eight years but I did notice when I started clearing areas, the slash piles that rotted had a very nice layer of topsoil that I was able to save. Digging around the old growth stumps also produced nice soil that was distributed through out the orchard.

As previously discussed, okay I rambled about it for days to anyone who would listen, I have about twenty five old growth stumps that are simply too big to remove in a cost effective way. They range in size but the average stump is about three feet in diameter. For almost all of these I was able to have them cut almost flush to the ground. Some of them I buried with dirt and planted grass on top of them. Those were the stumps that were able to be cut at grade. Most of them were not. I piled stones on top of them so I can see them in the spring when I mow.

img_4893

I bought a crapy push mower off of Craig’s List just for this purpose. I’ll be able to mow tight to each stump which I wouldn’t be able to do with a brush hog. A few times of mowing should keep the weeds low enough that the alpacas can graze everything.

Back to huglekulture! An enormous stump cluster, which appears have been three trees growing close together proved impossible to deal with, excavator, bull dozer and tractor all gave it the thumbs down or the middle finger up, however you want to look at it. I covered this area (about eight feet long by four feet wide) with sticks and leaves and dirt and a couple of road kills. I topped the entire thing off with a tarp and let it sit for about seven months. I was hoping to rot the thing down somewhat. I recently took the tarp off in a stretch of good weather and was surprised to find it still moist. This stump cluster is in an area I want to have a vegetable garden. I thought about huglekulturing it right on up except it would have been about seven feet tall, not ideal!

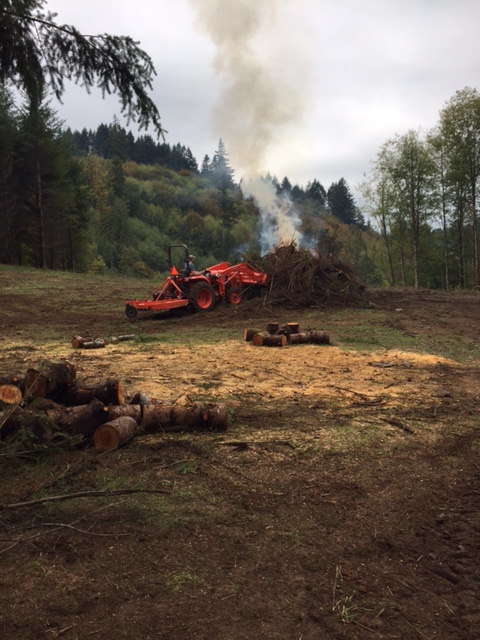
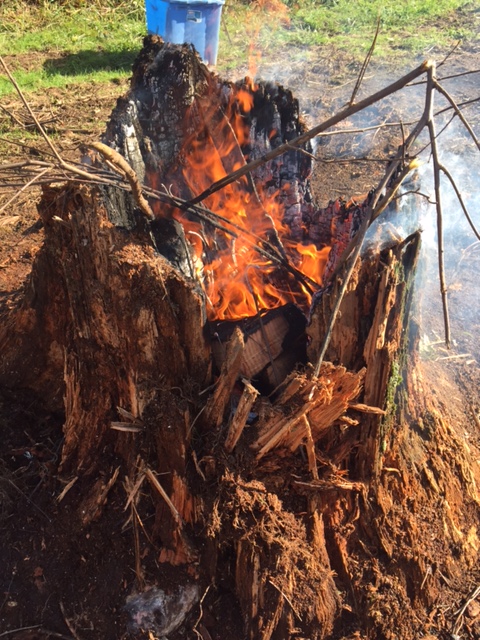
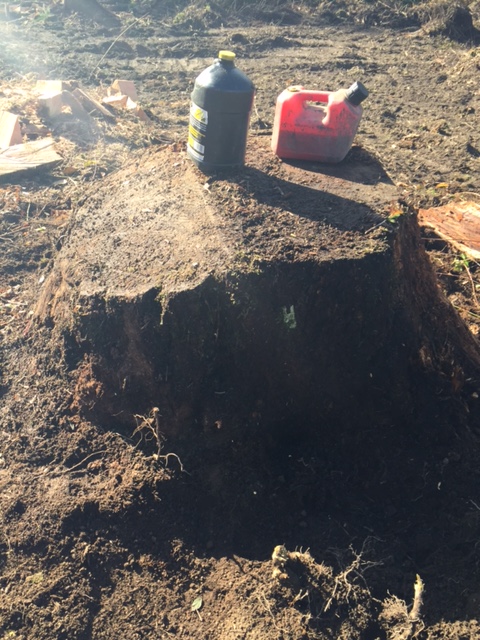
In order to make the mound smaller I made a fire on it. Everyone knows to make big hot fire you must first make little hot fire. My husband reminds me of this constantly. I built a fire and used a leaf blower and some diesel gas to get it going. I am not recommending starting a fire with gas. It is however, very effective!

img_5248

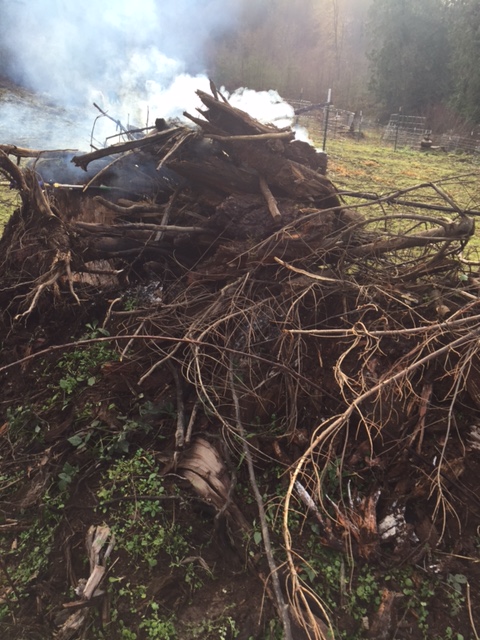
This fire would have needed to burn for about six weeks and reach a temperature of four billion degrees to completely take out the stumps, I certainly didn’t have time for that. My goal was to burn the thing down enough to make it manageable for a huglekulture bed.

img_5256

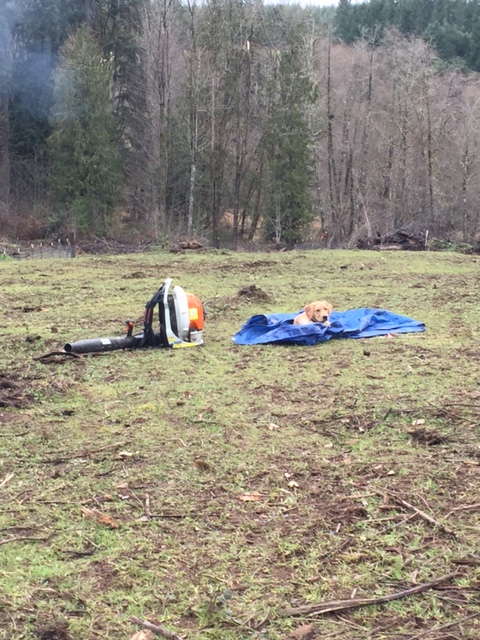
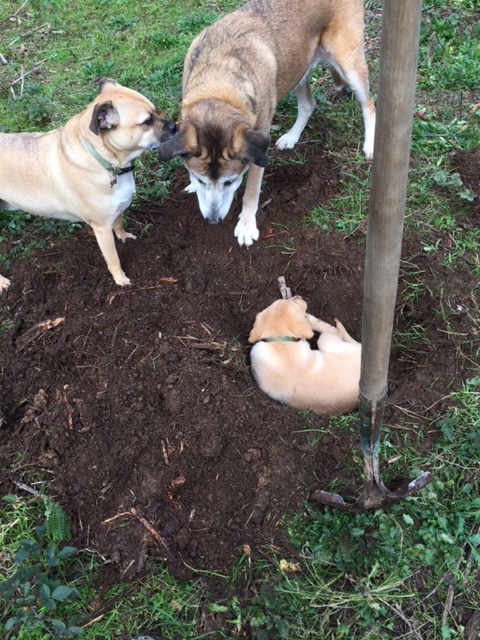
This took some time. About seven hours. Even my helper pooped out on me.

img_5254

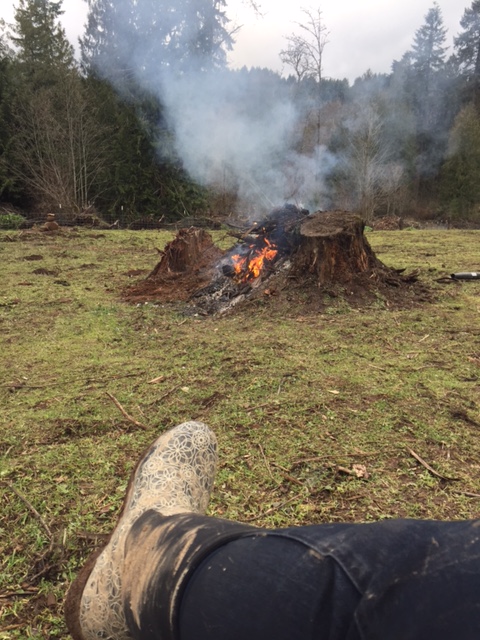
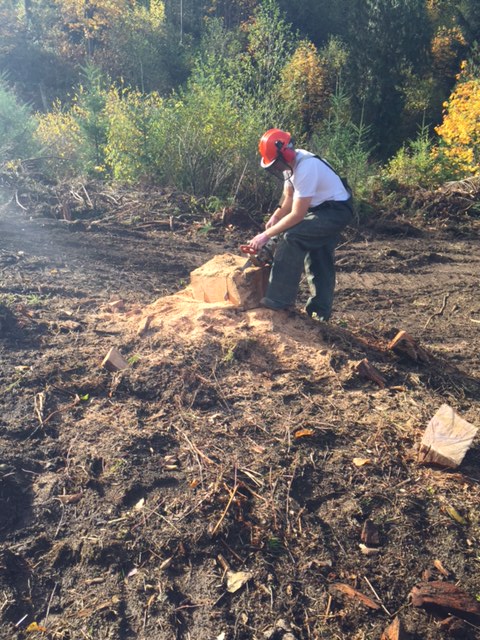
The fire eventually died down, in the above photo you can see the center burnt the best, the two stumps on the end were too wet to really burn. After several days, the fire was still warm in the center, I spread the ashes out and examined what I had. The end stumps still remained but the center was nicely burnt down, practically flush with the ground. I had my husband cut the two end stumps with a chainsaw so that there were much lower to the ground and then we had a snowstorm so…photo unavailable.

I plan to make my huglekulture bed when the snow melts. I will dig down a bit and add some wood and organic matter (thanks to alpacas and their use of dung holes I have no shortage of manure) and cover the entire thing with dirt.  I will most likely make this my composting spot as well and top the entire thing off with wood chips which we have no shortage of thanks to the wood chipper PTO. It’s going to look like I buried a cow but I’m hoping over the course of a few seasons it will continue to rot down and maybe before I die it will even be flush with the ground.


White Trash Logging

Usually when my husband says “Get a bid” what he means is, “ask a professional what they would charge so I can decide to do it myself because I don’t want to pay to have work done.” Some things are worth paying for. Things that require specialty equipment or things that might wreck a marriage such as plumbing. I am also a fan of paying for things that are dangerous, such as removing big trees. My husband for some reason doesn’t find that dangerous.

After getting a quote from a logger we decided to take things into our own hands. We had a paddock that I wanted to clear. Eventually my horse will live in this paddock but in the mean time it would be a handy place to trap the alpacas so they can get sheared. (Running around twenty acres with a pair of clippers does not sound fun.) This paddock, of course, was covered with trees, some of them quite large.

Getting the trees down was not the issue. That’s why the chainsaw was created. Stumps. Stumps are a huge issue. In this particular case, for this paddock, which is approximately one hundred by one hundred feet, I planned to use it as a winter turn out for my horse so it would have gravel and sand for mud free footing. We decided that we would cut the stumps flush with the ground since they would eventually be covered with gravel and sand. Except my husband had an idea. A stump removal idea.

After we discussed the idea, and I said, “Wait. Will that acually work?” we decided to find out. Climbing the tree and hooking a chain around it and attaching the other end of chain to the back of a truck we would simply pull the tree out of the ground. Luckily we have a crazy neighbor who thought this was a great idea. He drove the truck and also climbed the trees. Because why not.

It turns out that not all of the trees wanted to give up their roots and move. About one third of the trees popped right out of the ground. The rest either broke, snapped near the chain or got the chainsaw because they weren’t budging. img_3999

This is a tree that ended up needing to be chainsawed. Since the chain was still wrapped around it we drug it with the truck to the cutting deck. Because why not. It took a couple of weekends to remove all of the trees (about thirty total) in the paddock, create a cutting deck and cut them for firewood. It took another day to cut any stumps flush with the ground, not an easy task because if a chainsaw touches dirt, well…you get cursing.

Once the trees were gone, I used my front loader on my tractor to ‘bury’ and stumps that we could see, I used my gradder/scrapper attachment to then smooth the entire paddock. My husband then used the gradder/scrapper to smooth the entire paddock incase I didn’t do it right. img_4227

All of the branches and tops of the trees were moved with the tractor to a burn pile nearby. When the weather cooperated we burned the pile. We waited a couple of months and the pile dried out a bit, a leaf blower and some diesel gas helped get the fire started, the tractor kept it going. I am not recommending you drive a tractor into a fire. I think it is dangerous. My husband drove it into the fire because why not. It’s a guy thing. img_4422

The burn pile eventually smoldered down to nothing. But it had to get really HOT first. When it cooled completely I spread the charcoal on a nearby field. I planted grass on the paddock to keep it from growing weeds, the free ranging alpacas keep the grass mowed. Eventually I will fence the area and make it mud free.

img_4021


Got Wood???

Clearing land often involves taking out trees. We have a lot of trees. About 20 acres worth. Loggers have looked at them and scratched their heads. Generally they look at me and ask,

“Lady, are you serious?”

This is in response to my telling them I want the trees cleared away and the stumps and limbs all gone because I want to turn the area into pasture. The problem is that the trees have very little value from a logging standpoint. If I want them gone I’m going to have to pay the loggers. A lot.

Since I like to think outside the box (in fact, I like to tear the box up and use it as kindling) I decided to get practical and cut the trees up for firewood and sell it. We invested in a log splitter. If you are going to cut and split more than a few cords of firewood a log splitter is in order. I love my log splitter. The first day I crushed my finger and a watched a purple bruise rise under my fingernail. I put my glove back on, said a few curse words and carried on but I must admit it really hurt. Getting your finger crushed is about the only danger with the log splitter (I’m certain there are other ways to get hurt-I’m just pointing out you’d have to work pretty hard at it).

The best part about the log splitter that it is available through Amazon.com. It is also Prime eligible! Free shipping? Yes! There is the small issue that the log splitter comes in a crate and you need to assemble it but it is no worse than something from IKEA.

IMG_3954

Once you assemble it and check the fluids, just add some gas and you’re good to go. You can split tons of wood in a short period of time.

IMG_3750


The Marmorated Sink Bug, Move over Box Elders.

We have a new visitor to our house this year. In previous years our winter home was full of mild mannered box elder bugs. They were on the ceiling, next to the bed, in our coffee cups and generally on any surface you wanted to set something down. I respected those box elder bugs, they had the good sense to stay still while you crushed them with a seed catalog.

Our new resident is the brown marmorated stink bug. I didn’t  know what the word marmorated meant but I thought it might translate from the latin for ‘smells bad when smashed with junk mail.’ My husband informed me that marmorated is actually a medical term,  it denotes a condition in which the appearance of the skin is streaked like marble. My husband also informed me that I should really know that because I used to work in an insect lab. I reminded him that was a long time ago and I had to make room in my brain for other things #reallife.  Plus I was pretty sure insects had a chitinous exoskeleton and not skin, so I disagreed with the bug name on principle. The marmorated stink bug, does however, have a brown marble-like look to it which makes it blend in with tree trunks and rustic furniture from Pottery Barn.

The marmorated stink bug has a feature that makes it rather ill suited for life inside the house. Basically it smells really bad when you kill it. This little bug has holes in its abdomen which can emit an odor when injured. This really decreased the amount of people in my household that were willing to smash the bugs. The other problem with the bugs is that they sometimes emit the oder for no reason, like you just walked by or you accidentally nudged them off the rim of your coffee cup. It’s like being in a house full of nervous little dogs that express their anal glands every time someone sneezes.

The bugs have another annoying feature. They become very animated in a warm room and they fly around haphazard like, bouncing off lights and walls, like a drunk uncle at a christmas party. They will also fly around and run into people which unfortunately signals them to emit their unpleasant odor especially if the person is trying to bat the crazy bug away from their face.

I decided to collect my bugs and mail them to a researcher at OSU, after seeing a post on social media requesting them. I can only assume she was collecting the bugs for scientific reasons, but I didn’t ask because I really wanted to send five hundred bugs priority mail- mainly so I could tell the people in the post office my package didn’t contain lithium batteries or perfume-just the natural perfume of the marmorated stink bug.

Collecting the bugs was no easy task. I thought I had five hundred of them in my living room but it only turned out to be fifteen. I shoved them in the priority mailer anyway, trying to ignore the stench and dutifully drove them to the post office. I have no idea if they were received, the researcher took her post down the next day, probably over whelmed by the amount of people wanting to send her bugs.

We’ve learned to live with the stink bugs, giving them a wide berth. Eventually they moved out or maybe just blended in with the furniture, hard to say, but there are definitely less of them. All in all, I’ll take a box elder any day. They have the good sense to sit still when relocated. Or smashed. And they’re odor neutral.

Pink Alpacas

Felted soaps are gaining popularity, a washcloth and loofah all in one, they are a time saver and efficient way to help keep your soap fresh and last longer. The wool has natural anti-fungal properties and provides mild exfoliation.

At Rain Barrel Acres we felt our soaps with our Alpaca fleece and merino wool. The alpaca fleece is super soft and the merino is just enough to hold all the felting together. Each felting is unique and makes a beautiful pattern.

I had a fabulous weekend selling soap at an artisan show.  A lady asked me about my felted soaps. I explained that I used my alpaca’s fleece to felt the soap. She then asked me if my alpaca was pink. I explained that we DYED the alpaca fleece pink.  She nodded in an understanding fashion and then asked if the alpacas mind being dyed. I explained that we dyed the fleece AFTER we sheared it off the alpaca. She told me she thought that was probably a better route and bought several soaps. She said they would make great gifts for her friends that didn’t know about pink alpacas. I agreed whole heartedly, a pink alpaca is a rare thing.

IMG_1224


Cider Day

In a good year a small orchard can produce fourteen million apples. We have about 25 fruit trees (I say about because a couple are questionable after being mutilated by deer) and this year was a good year for fruit.

IMG_1310

One of the greatest things about an orchard is making fresh cider. We make cider in the fall with a cider press. The cider press is one of the greatest inventions of all time. My handy engineer husband built the press several years ago after spending some quality time researching designs. For many weeks we received strange packages in the mail. I called my husband at work to ask him if he ordered a drive belt for a volvo. He assured me he had and that he needed it for the cider press. Eventually after much banging and welding he wheeled a cider press out of the garage.

IMG_1312

We pick the apples, smash the apples and press the apples to make a beautiful nectar called fresh cider. The best cider (IMHO) is made from a blend of apples and pears. We have several old pear trees (not sure of the variety) and four different types of asian pears that we mix with the apples. Some of our apples are ‘variety unknown’ but we do have gala, fuji, red and golden delicious. They all blend to make fabulous cider. This year we pressed all fourteen million apples.

IMG_0203

Aaaaaannnndddddd…More Stumps

Stump day. That’s what we call it when we work on stumps. Today was a big day because we got rid of 3 stumps.

My burning stump method worked great on my rotten stump. I started a fire inside of it with match light briquettes and general twigs and branches that I scavenged. This stump was pretty rotten down the middle and it was very dry because I covered it to keep the rain out.

IMG_1045

My fire got going pretty quickly and I got lucky when a hole burned through near the bottom of the stump (from the inside to the outside) providing good air flow to my fire. If I had been thinking I would have brought my leaf blower which would provide A LOT of oxygen. Next time.  While this sucker burned, the husband got to work on a really, really big stump.

We have a professional arborist chainsaw. It is an Echo and it works great. The only issue is that it has a 16 inch bar. This means that it is not going to cut a 3 ft diameter stump all at once. Luckily the husband likes to tackle the big jobs.

IMG_1046

Making a series of what seemed like a million cuts, the stump was chunked up a little at a time. Tedious? Yes.

IMG_1029IMG_1047

Eventually the stump was taken down pretty much flush to the ground. I will put a really big scoop of soil on top and feather it out. Probably in the spring I will forget it is there and break my leg trying to plant a tree.

We got rid of another smaller stump and I was able to clear around several more.

IMG_1033

Stump town is looking good, even with my finger in the way!